Home
Portfolio Backtester
About the Project
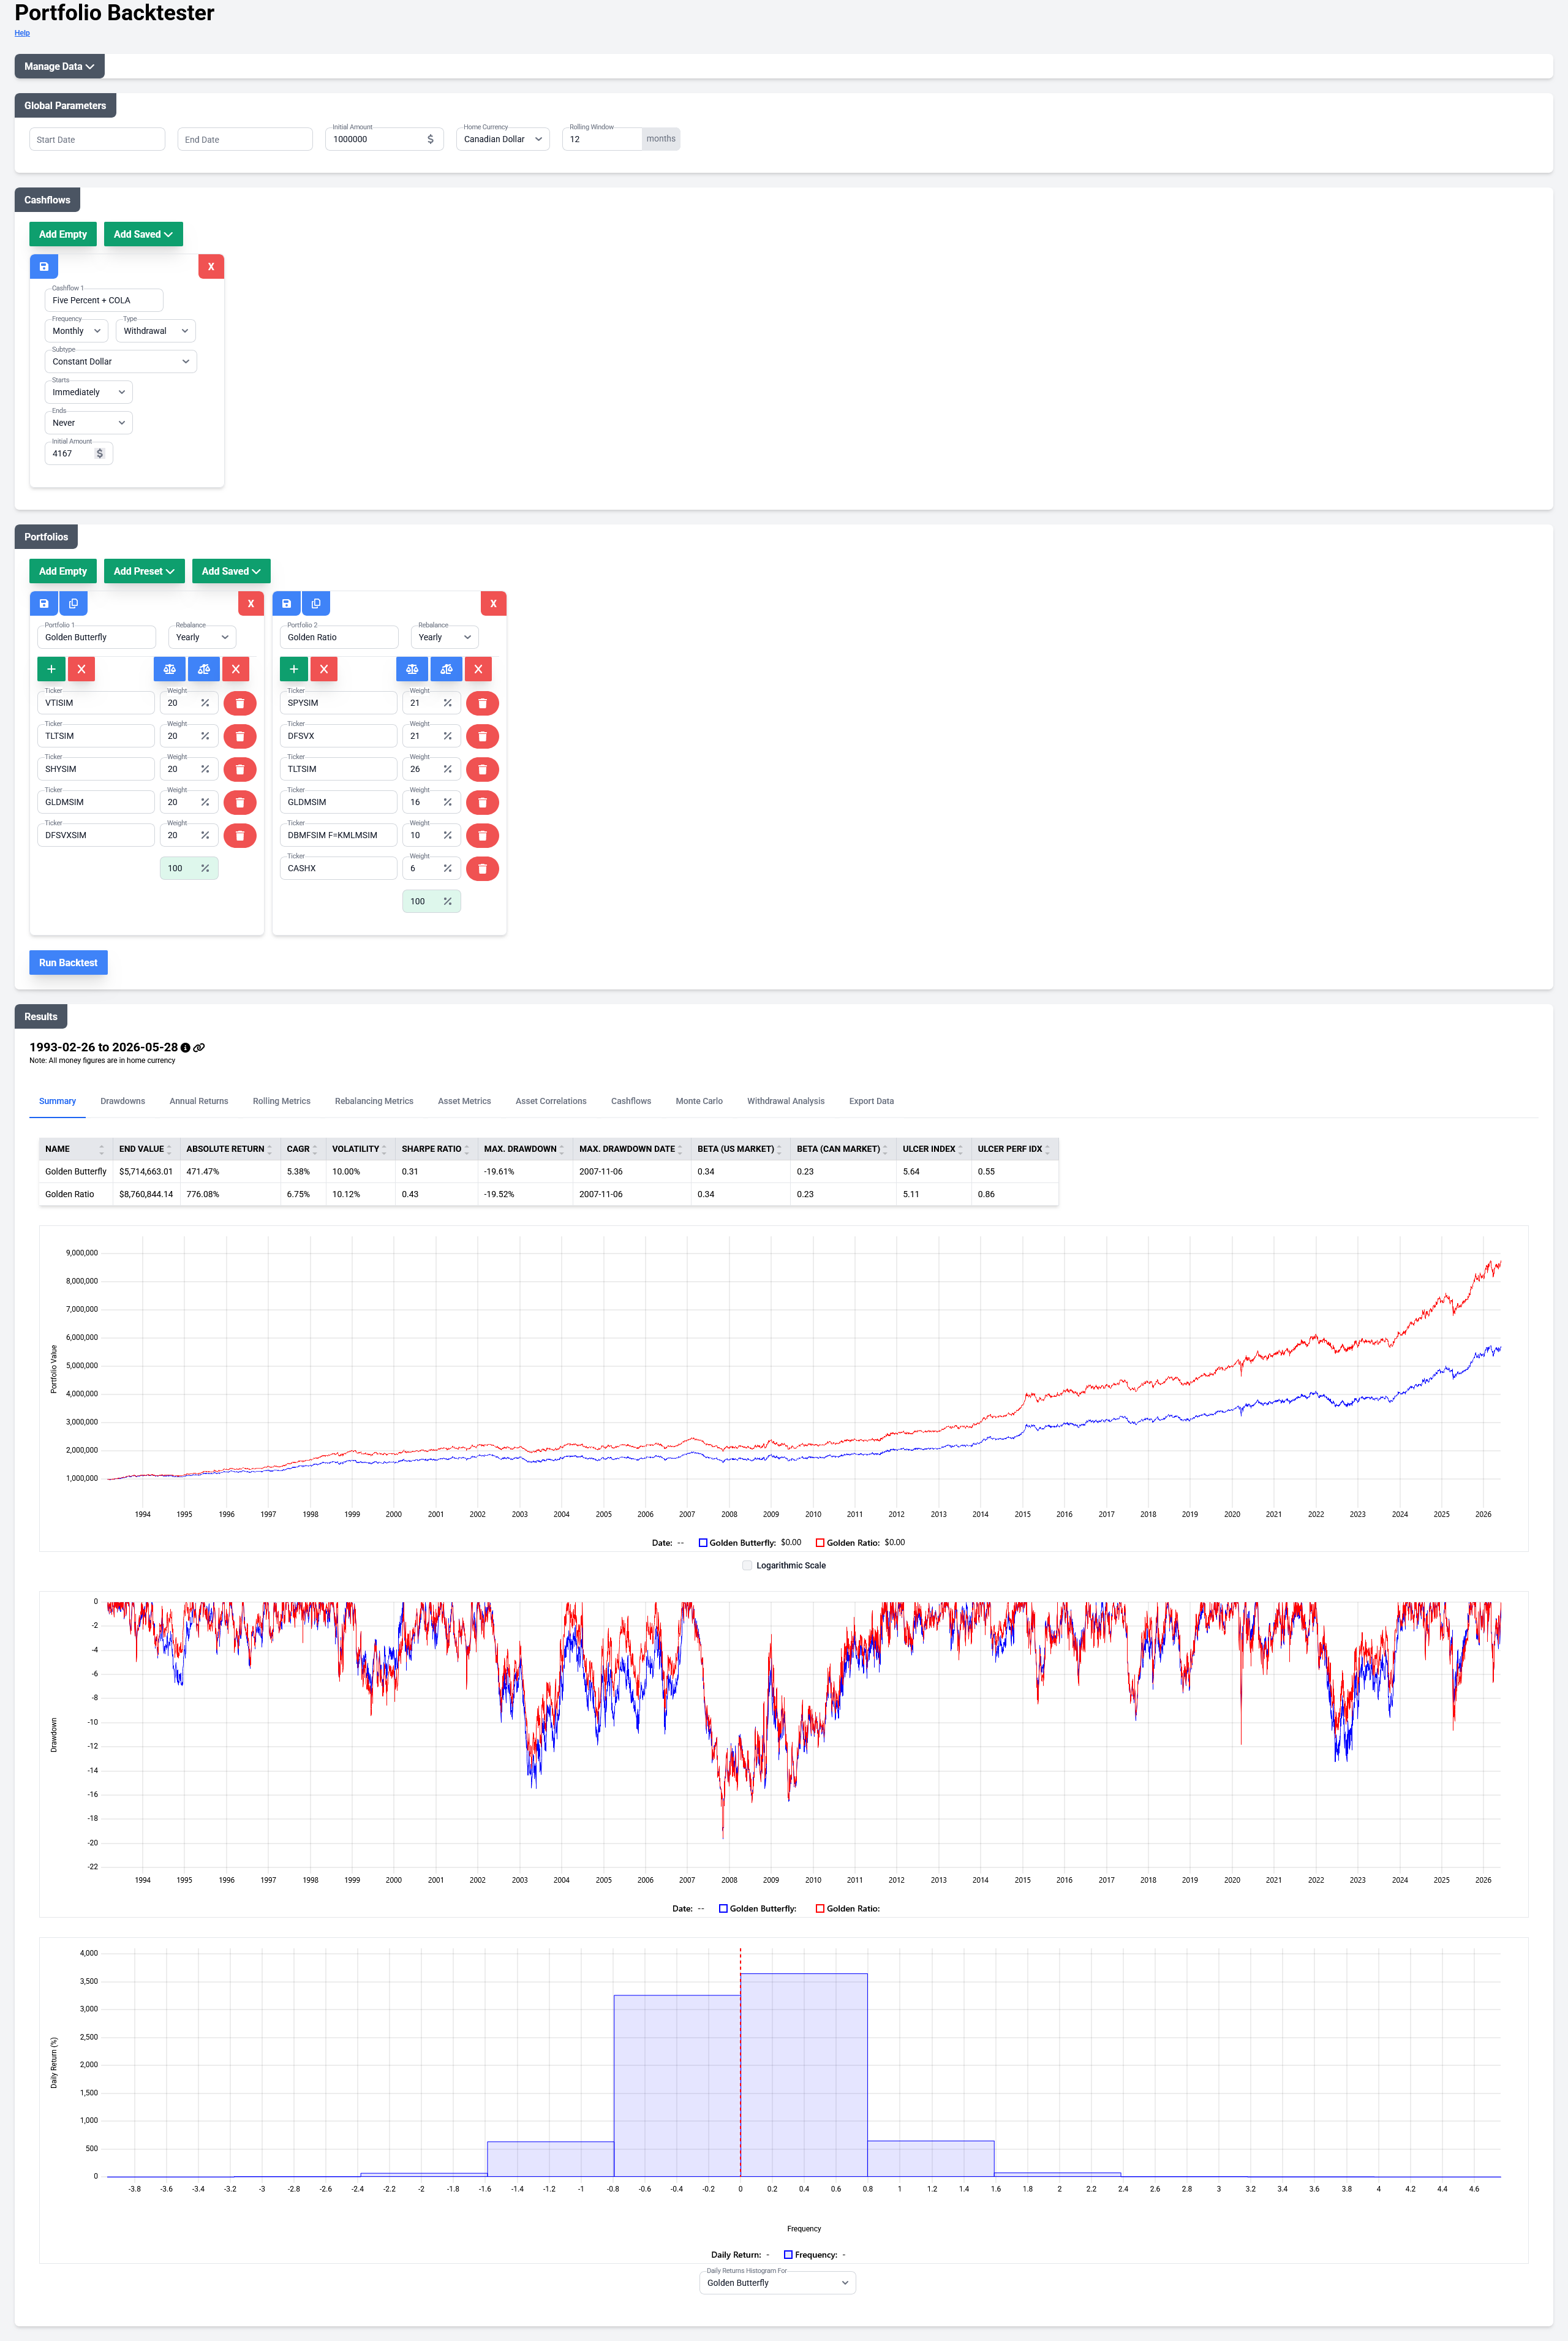
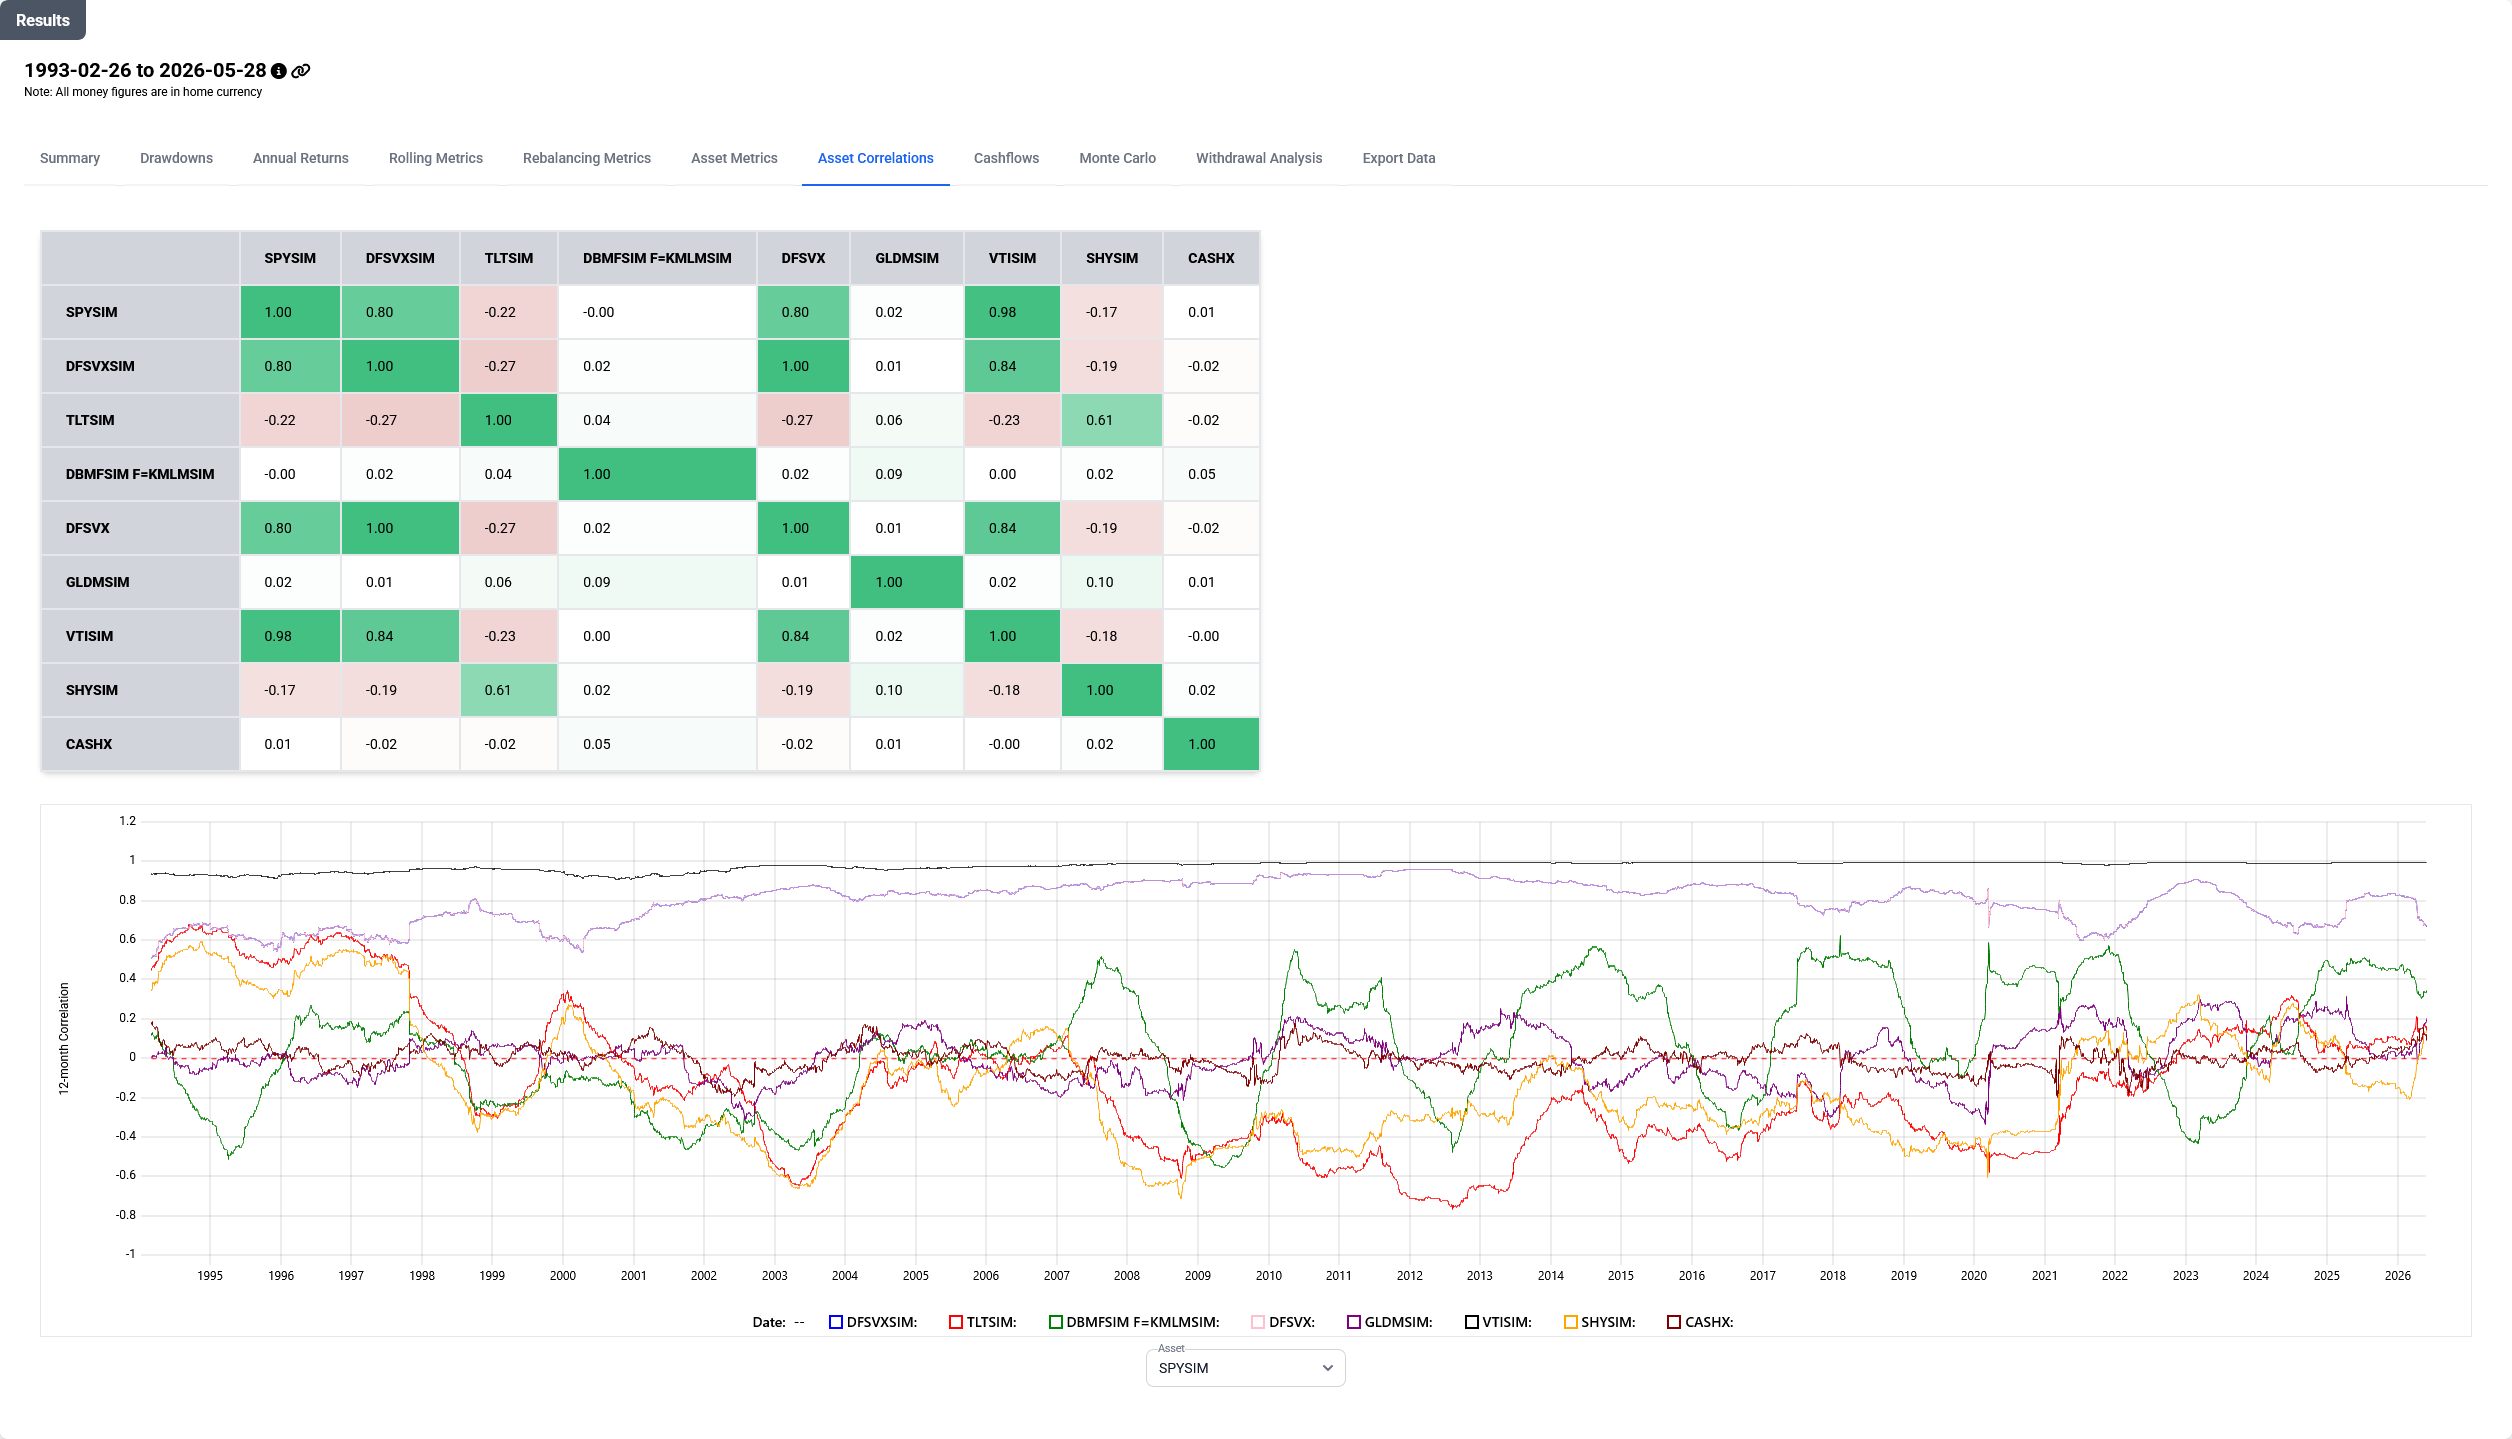
Inspired by testfol.io, this project allows you to backtest a portfolio. The key difference is that this project supports CAD currency, in addition to USD.
The application runs as a web application in your web browser.
Data sources:
- Yahoo Finance for stock market data
- FRED for US rates
- Valet API for Canadian rates
Screenshots:


For End-Users
For users who need more detailed instructions, please refer to GETTING_STARTED.md.
Only Windows 10/11 x64 is supported at this time.
- Create a FRED API key and save it to the clipboard: https://fredaccount.stlouisfed.org/apikeys
- Download the latest release zip
- Unzip in an empty folder of your choice
- Navigate to the
managesubfolder under the folder where the files were unzipped - Double-click on the
Backtestershortcut to start the program - When prompted to do so, paste your FRED API key
- If you enter the wrong key by accident, hit CTRL-C to exit, delete the file named
fred_api.keyand re-launch the backtester as stated above
- If you enter the wrong key by accident, hit CTRL-C to exit, delete the file named
- Browse to http://127.0.0.1:8000/
Additional documentation can be found in DOCS.md.
List of special tickers that can be used:
| Ticker | Description |
|---|---|
| CASHX | US Risk-Free Rate (3 month T-Bill) |
| CASHX.TO | Canada Risk-Free Rate (3 month T-Bill) |
For Developers
Getting Started
- Clone this repository and change to the root folder of the repository.
- Install a C++ compiler and VSCode. On Windows (using the
btcpp.vsconfigfile in the root of this repository):winget install --id Microsoft.VisualStudio.2022.Community --override "--passive --config btcpp.vsconfig" winget install --id=LLVM.LLVM -e winget install vscode - Install Python. On Windows:
winget install -e --id Python.Python.3.13 - Create an account for the FRED API and request an API key: https://fredaccount.stlouisfed.org/apikeys
- Copy the API key into a file named
fred_api.keyin the root folder of this repository. Then, in Powershell:python -m virtualenv .venv .venv\Scripts\Activate.ps1 pip install -r requirements.txt - Open VSCode
- Install the C/C++ Extensions Pack
- In the command palette (CTRL+SHIFT+P), run
CMake: Select a Kit, choose[Scan for Kits]then choose the most recent version ofClang(notClang-cl, notVisual Studio) - In the command palette (CTRL+SHIFT+P), run
CMake: Select Variantand chooseRelease - In the command palette (CTRL+SHIFT+P), run
CMake: Build targetand chooseall
Web UI
- Follow the steps in
Getting Started - Run the following to start the server:
set_environment_vars.ps1 python .\manage.py runserver - Browse to the following URL:
http://127.0.0.1:8000/
Extra Steps for Development Work
- In VSCode, the following extensions are required:
- Microsoft Black Formatter (for code formatting)
- Austin VS Code (for profiling)
- Install NPM
winget install -e --id OpenJS.NodeJS - Add
npmto PATH. Run the following in a Powershell session running as administrator:[Environment]::SetEnvironmentVariable("Path", $env:Path + ";C:\Program Files\nodejs", "Machine") - Install Tailwind CLI:
npm install -D tailwindcss - Install Flowbite:
npm install flowbite - Start Tailwind auto-build:
npx tailwindcss -i ./css/tailwind_input.css -o ./static/tailwind.css -c ./css/tailwind.config.js --watch
Running Google Tests
To run the google tests, you need to modify the PATH to include the location of the python run-time DLL (eg. python313.dll). You also need to set PYTHONPATH to point to the packages in the virtual environment. Example in Powershell:
$env:PYTHONPATH="C:\repo\Projects\backtester\.venv\Lib\site-packages"
$env:PATH="C:\Users\user\AppData\Local\Programs\Python\Python313;"+$env:PATH